
How to Change a Baby Diaper: A Step by Step Guide
- Published October 11, 2026
- Updated October 11, 2026
- 7 min read
Changing a baby diaper takes about 2-3 minutes once you have the routine down.
Gather a clean diaper, wipes and cream first, keep one hand on your baby, wipe front to back, fasten the new diaper with two fingers of space at the waist and wash your hands after every change.
TL;DR: The Quick Answer
- Changing a baby diaper takes about 2-3 minutes once you have the routine down.
- You need a clean diaper, baby wipes, and a flat, safe surface before you start.
- Always wipe front to back on baby girls to prevent urinary tract infections.
- Newborns need diaper changes 8-12 times per day; older babies typically need 6-8 changes.
- A properly fastened diaper sits snug at the waist with two fingers of space – not so tight it leaves marks, not so loose it gaps.
- What You Need Before You Start
- Step 1: Place Your Baby Safely on the Changing
- Step 2: Open the Dirty Diaper Without Removing
- Step 3: Clean Your Baby Front to Back
- Step 4: Lift Baby's Bottom
- Step 5: Apply Diaper Rash Cream If Needed
- Step 6: Fasten the Diaper and Check the Fit
- Step 7: Wash Your Hands
- Common Problems and How to Fix Them
- How to Change a Diaper in a Public Restroom
- How Often to Change a Baby's Diaper by Age
- Cloth vs. Disposable Diapers
- Common Mistakes to Avoid When Changing a Baby
- FAQ
- Key Steps
Diaper Changing: The 7 Steps at a Glance
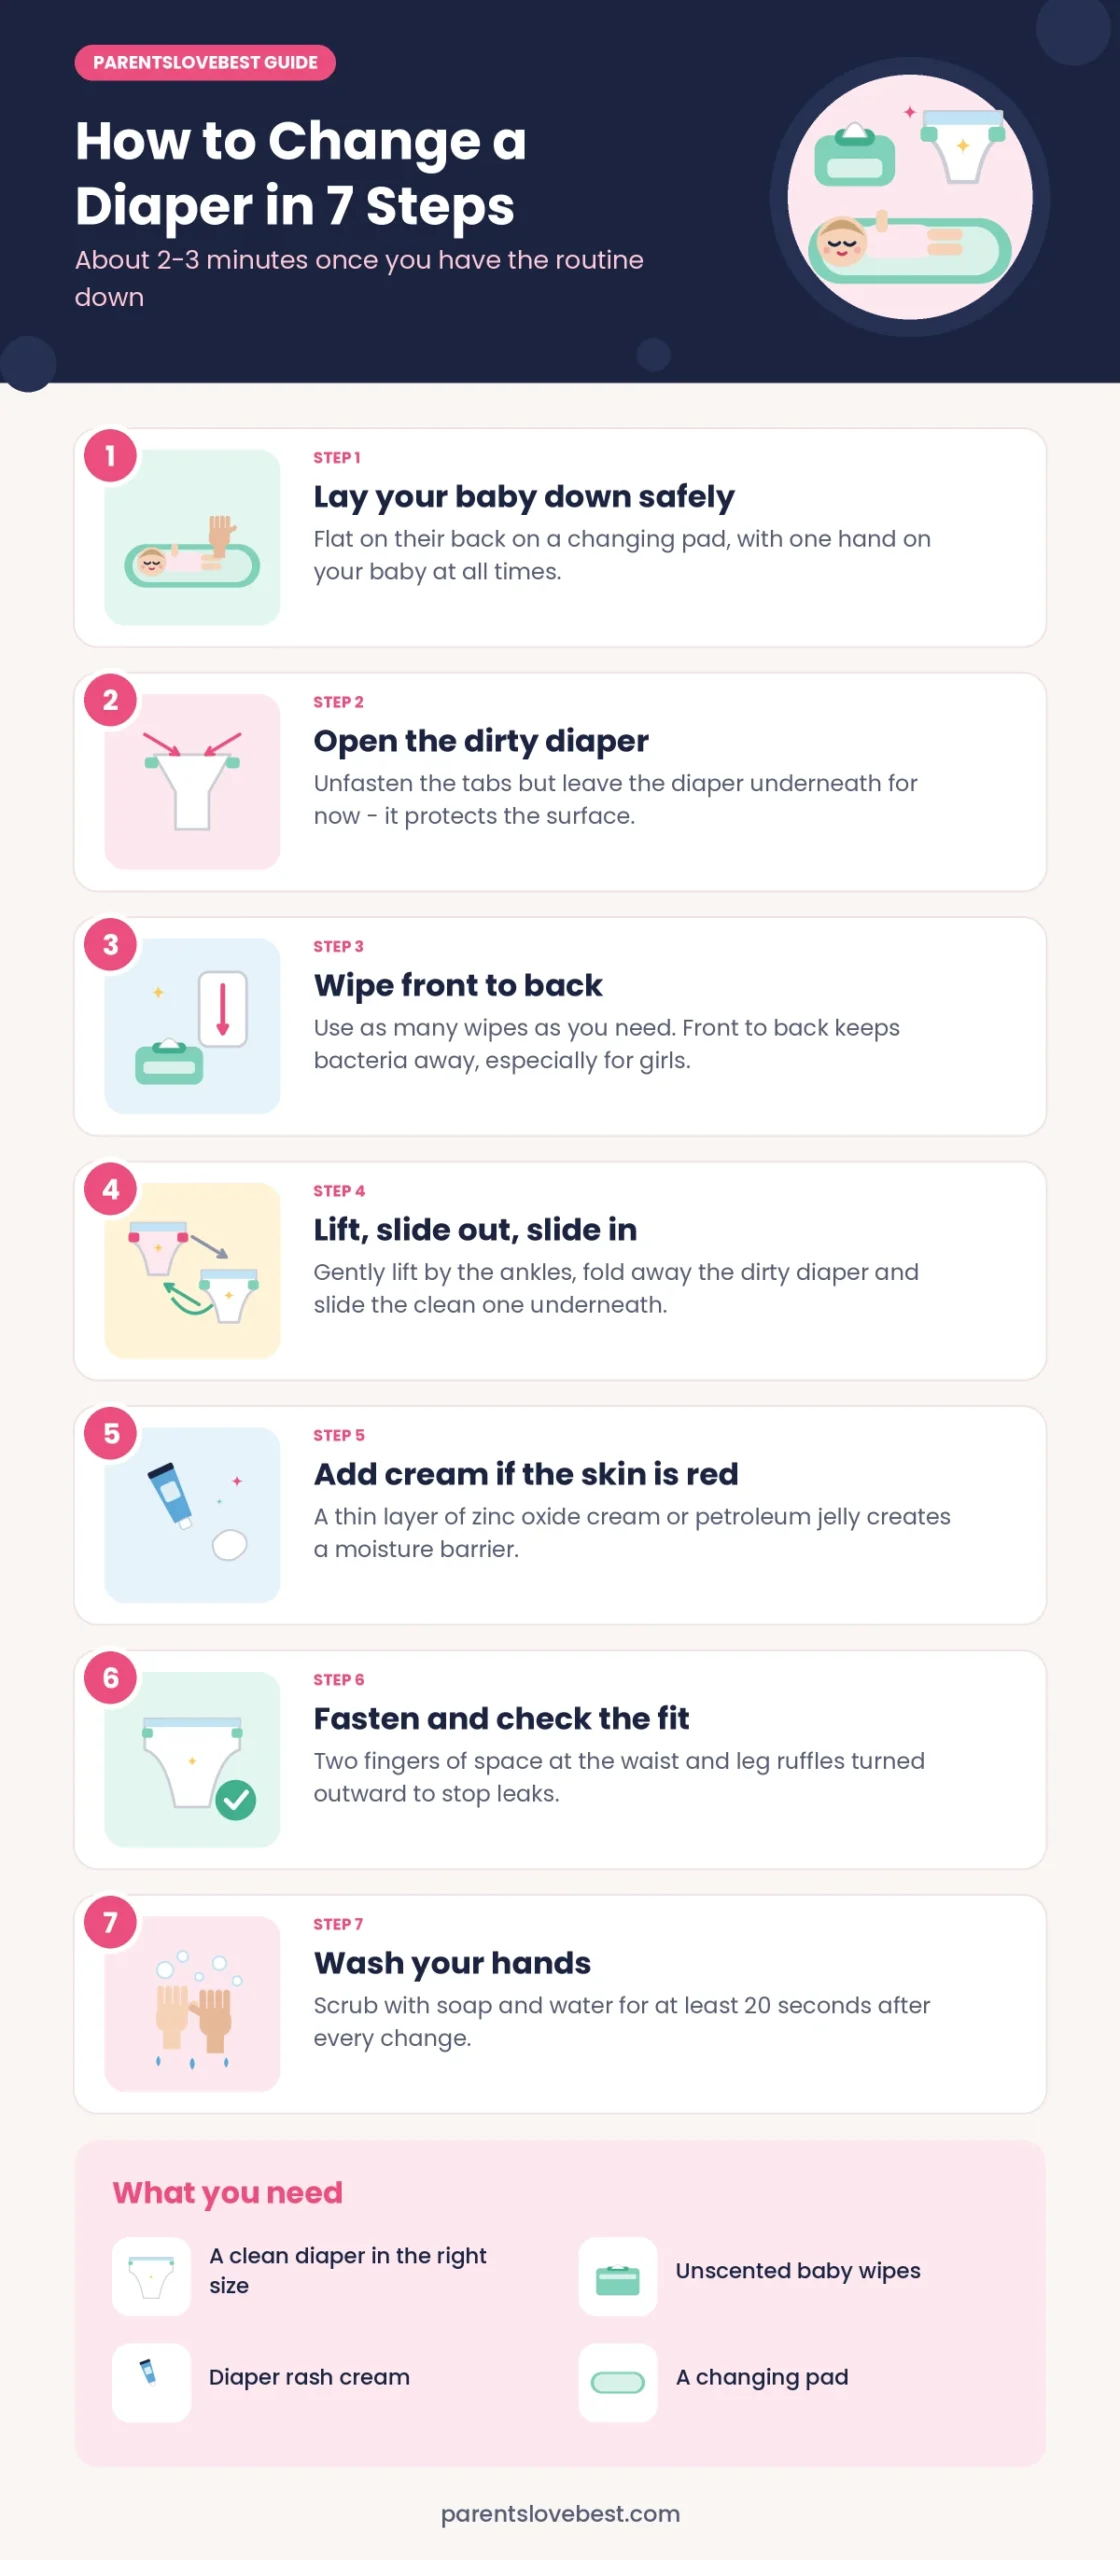
What You Need Before You Start
Gather everything before placing your baby on the changing surface. Reaching for supplies mid-change means taking a hand off the baby, which is a fall risk on any elevated surface.
One clean diaper in the correct size for your baby's weight
For example, Pampers Swaddlers Newborn
Baby wipes (unscented for newborns with sensitive skin)
Diaper rash cream or petroleum jelly, if your baby has redness
A changing pad or clean, flat surface at a comfortable height
Protect it with one of our changing pad liners
A spare set of baby clothes, in case of a blowout
Step 1: Place Your Baby Safely on the Changing Surface
Lay your baby flat on their back on the changing pad. If you are using an elevated changing table, keep one hand on the baby at all times. Babies can roll off a changing table in under a second, even before you think they are mobile enough to do so.
Good to know
If your baby is a newborn, support the head and neck as you lower them down. Once they are flat and settled, you can proceed.
Step 2: Open the Dirty Diaper Without Removing It Yet
Unfasten both side tabs on the dirty diaper and fold them back so they do not stick to anything. Lift the front panel down toward your baby’s feet, but leave the diaper under them for now.
Good to know
This matters because the back of the diaper acts as a barrier underneath your baby during the next step. Removing it too early means a mess on your changing surface.
Step 3: Clean Your Baby Front to Back
Use a baby wipe to clean the diaper area. Always wipe from front to back, never back to front. This direction prevents fecal bacteria from reaching the urethra, which causes urinary tract infections – especially important for baby girls.
For baby boys, lay a clean wipe or corner of cloth over the penis before opening the diaper fully. Exposure to air frequently triggers urination mid-change.
Use as many wipes as needed to clean the area
Do not rush this step. Residue left behind is the main cause of diaper rash.
Step 4: Lift Baby's Bottom and Slide Out the Dirty Diaper
Grasp both of your baby’s ankles gently with one hand and lift their bottom just high enough to slide the dirty diaper out from underneath. Fold the dirty diaper closed on itself – tabs over the soiled area – and set it aside out of reach. At home, a diaper pail keeps odors contained.
Good to know
Slide the clean diaper under your baby while their bottom is still lifted. The back edge of the clean diaper (the part with the tabs) should sit level with your baby's waist.
Step 5: Apply Diaper Rash Cream If Needed
Lower your baby’s bottom onto the clean diaper. If their skin looks red or irritated, apply a thin layer of zinc oxide cream or petroleum jelly to the affected area before fastening the diaper. Both create a moisture barrier between the skin and the next wet diaper.
Good to know
You do not need to apply cream at every change unless redness is present. Routine use is not necessary on healthy skin.
Step 6: Fasten the Diaper and Check the Fit
Pull the front panel of the clean diaper up over your baby’s belly. Unfold the tabs and press them firmly onto the front of the diaper, one on each side, so the fit is even.
Check the fit using these three points:
Waist
Slide two fingers under the waistband. It should fit snugly but not dig in.
Leg cuffs
Run a finger along the leg openings and make sure the ruffled edges are facing outward, not tucked in. Tucked-in ruffles cause leaks.
Front
The diaper should sit just below the belly button on a newborn, or at the natural waist on older babies.
Good to know
For newborns whose umbilical cord stump has not yet fallen off, fold the front waistband down to keep it below the stump and avoid irritation.
Step 7: Wash Your Hands
Wash your hands with soap and water for at least 20 seconds after every diaper change. Hand sanitizer is a backup option when a sink is not available, but soap and water is more effective at removing the specific bacteria present in fecal matter (CDC).
Common Problems and How to Fix Them
| Problem | Likely Cause | Solution |
|---|---|---|
| Diaper leaks at the legs | Leg cuffs are tucked inward | Unfasten the diaper and refasten with ruffles flipped outward |
| Diaper leaks at the back | Diaper is too small or fastened too loosely | Size up or pull tabs tighter so no gaps remain at the waist |
| Persistent diaper rash after 3 days | Yeast infection, not standard rash | See a pediatrician – yeast rash needs antifungal cream, not zinc oxide |
| Baby rolls away mid-change | Normal from around 4 months | Keep a toy at the change station to hold their attention; never leave unattended |
| Red marks on hips after removal | Diaper is too tight | Loosen the tabs or size up to the next diaper size |
How to Change a Diaper in a Public Restroom
Most public restrooms have a fold-down plastic changing table, usually in the larger accessible stall. Before placing your baby on it, wipe the surface with a disinfecting wipe or lay down a portable changing pad.
Carry a small travel changing kit
two or three wipes in a zip bag, one spare diaper, and a small tube of rash cream. A full diaper bag is not necessary for short outings.
Dispose of the dirty diaper in the bin provided
Do not flush disposable diapers - they block pipes.
How Often to Change a Baby's Diaper by Age
Newborns produce more waste and have more sensitive skin, so they need more frequent changes. As babies grow, the frequency typically decreases.
| Baby’s Age | Expected Changes Per Day |
|---|---|
| Newborn (0-4 weeks) | 8-12 changes |
| 1-6 months | 6-8 changes |
| 6-12 months | 5-6 changes |
| 12+ months | 4-6 changes |
Good to know
Change the diaper immediately after any bowel movement, regardless of age. Sitting in stool - even briefly - irritates skin and causes rash.
Cloth vs. Disposable Diapers: Which Is Easier to Change
Disposable diapers are faster to change because they use adhesive tabs and require no prep. Cloth diapers (also called reusable diapers) use either snaps or a diaper cover with a liner and take slightly longer to change but generate no landfill waste.
Good to know
For parents learning the basics, disposable diapers are easier to start with. Cloth diapering has a learning curve, but most parents who switch report mastering it within two weeks.
Common Mistakes to Avoid When Changing a Baby Diaper
Leaving the changing table unattended
Even for a second. Babies move unpredictably. If you forgot a supply, take the baby with you or call for help.
Wiping back to front on baby girls
This pushes fecal bacteria toward the urethra and is the leading preventable cause of UTIs in infant girls.
Fastening the diaper too tightly on newborns
The umbilical cord stump needs air and no pressure. Fold the waistband down and check for marks at the hips after each change.
Skipping rash cream when redness appears
A single day of untreated redness can become a full rash by the next morning. Apply zinc oxide cream at the first sign of irritation.
Using scented wipes on newborn skin
Fragrances are a common irritant on newborn skin. Use unscented wipes for at least the first three months, and consider diapers made for sensitive skin.
Frequently Asked Questions About How to Change a Baby Diaper
How do you change a baby diaper step by step?
Lay the baby on a flat surface, unfasten the dirty diaper, wipe front to back, slide out the old diaper, slide in the clean one, apply rash cream if needed, fasten the tabs, and check the fit at the waist and legs. Wash your hands after.
How often should you change a newborn's diaper?
Newborns need 8-12 diaper changes per day. Change after every feeding and immediately after any bowel movement. A wet diaper alone can wait up to 2 hours, but a soiled diaper should be changed right away to avoid skin irritation.
How do you know when a baby's diaper needs changing?
Most modern disposable diapers have a wetness indicator – a yellow line that turns blue when wet. You can also check by feeling the outside of the diaper for firmness. A soiled diaper is usually noticeable by smell within a few minutes.
What do you do if a baby's diaper leaks?
Check whether the leg cuffs are tucked inward instead of outward – this is the most common cause of leaks. Also check whether the diaper size is correct. A diaper that fits correctly should have two fingers of space at the waist and sit flat against the legs with no gaps. For nighttime leaks, try one of our best overnight diapers.
Is it okay to let a baby sleep in a wet diaper?
Yes, if your baby is asleep and the diaper is only wet, most pediatricians recommend letting them sleep rather than waking them for a change. Change the diaper before the next feeding. If the diaper is soiled, change it as soon as you notice, even at night.
How do you prevent diaper rash?
Change diapers promptly, clean the area thoroughly at each change, allow a few seconds of air-dry time before fastening the new diaper, and apply a thin layer of zinc oxide cream at the first sign of redness. Diaper rash most often appears when a baby sits in a soiled diaper too long or when skin stays damp for extended periods.
Key Steps at a Glance
- Gather all supplies before placing your baby on the changing surface.
- Keep one hand on the baby at all times on an elevated surface.
- Wipe front to back every time, especially for baby girls.
- Leave the dirty diaper under the baby until cleaning is done – it protects the surface.
- Fasten the clean diaper snug at the waist with two fingers of space, leg cuffs facing outward.
- Wash your hands with soap and water after every change.